Breaking News
Popular News


Enter your email address below and subscribe to our newsletter
網路補給站

wget https://github.com/cloudflare/cloudflared/releases/latest/download/cloudflared-linux-amd64
chmod +x cloudflared-linux-amd64
sudo mv cloudflared-linux-amd64 /usr/local/bin/cloudflared
wget https://github.com/cloudflare/cloudflared/releases/latest/download/cloudflared-linux-arm64
chmod +x cloudflared-linux-arm64
sudo mv cloudflared-linux-arm64 /usr/local/bin/cloudflared若使用 cloudflare tunnel 則無效果,對高流量網站非使用 cloudflare tunnel 則可提高 UDP buffer
vim /etc/sysctl.conf
# update socket buffer to 7.5mb
net.core.rmem_max = 7500000
net.core.wmem_max = 7500000
net.ipv4.tcp_rmem = 4096 87380 7500000
net.ipv4.tcp_wmem = 4096 65536 7500000
# ICMP Proxy
net.ipv4.ping_group_range = 0 2147483647
執行下列指令立即生效
sysctl -p
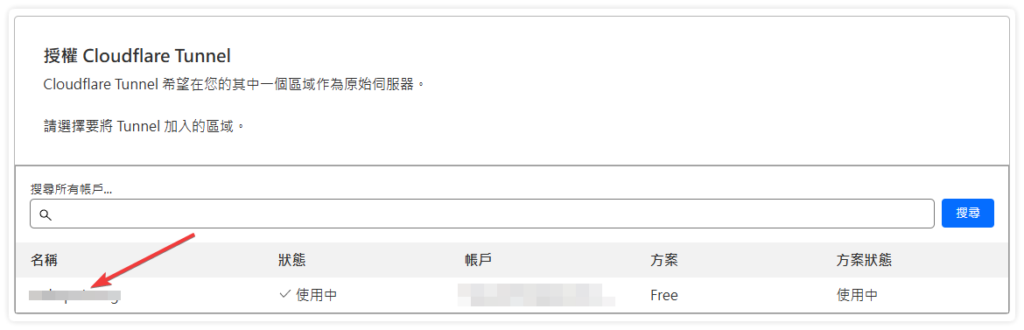
cloudflared tunnel login複製網址列,並將它貼上瀏覽器登入你 cloudflare 帳號選擇你要加入這個 tunnel 的網域,成功後會自動在使用者的家目錄建立 .cloudflared 的資料夾

建立連線名稱 mytunnel 請自行命名
cloudflared tunnel create mytunnel
下列指令會自動在你授權的域名上自動建立一個 CNAME
cloudflared tunnel route dns mytunnel mytunnel.mydomain.com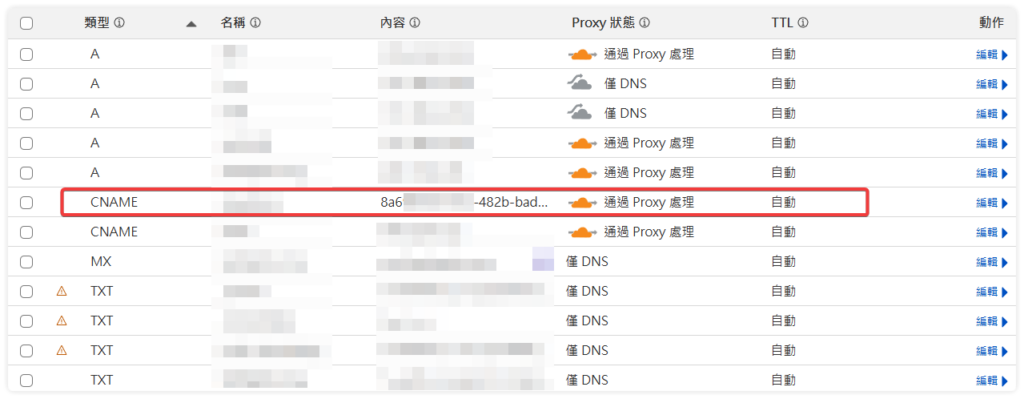
config.yml 配置檔cd ~/.cloudflared
touch config.yml
tunnel: your_connect_id
credentials-file: /home/user/.cloudflared/your_connect_id.json

ingress:
  - hostname: mytunnel.mydomain.com
    service: http://192.168.0.19:8080
  - service: http_status:404
cloudflared tunnel run mytunnelcloudflared tunnel info mytunnelnslookup mytunnel.mydomain.com因為我們是用 Cloudflare Tunnel 來做為 HestiaCP 管理介面的 DNS 所以必須修改管理介面的設定檔,讓 SSL 交由 Cloudflare Tunnel 接管
vim /usr/local/hestia/nginx/conf/nginx.conf
# 找到 listen port 那行將後面的 ssl 刪除
 server {
                listen              2083;   # 在這一行將 8083 後的 ssl 刪除
#               listen              [::]:2083 ssl;
                server_name         _;
                root                /usr/local/hestia/web;
                # Fix error "The plain HTTP request was sent to HTTPS port"
                error_page          497 https://$host:$server_port$request_uri;
                error_page          403 /error/404.html;
                error_page          404 /error/404.html;
                error_page          410 /error/410.html;
                error_page          500 501 502 503 504 505 /error/50x.html;

                ssl_certificate     /usr/local/hestia/ssl/certificate.crt;
                ssl_certificate_key /usr/local/hestia/ssl/certificate.key;
                .
                .
                .
               略
               location / {
                        expires off;
                        index index.php;
                                # 加入以下4項 proxy_set_header 設定將訪客的ip正確轉發
                        proxy_set_header Host $host;
                        proxy_set_header X-Real-IP $remote_addr;
                        proxy_set_header X-Forwarded-For $proxy_add_x_forwarded_for;
                        proxy_set_header CF-Connecting-IP $http_cf_connecting_ip;
                }
# 修改好存檔後 restart
nginx -t
systemctl restart nginx
systemctl restart hestia
tunnel: your_connect_id
credentials-file: /home/user/.cloudflared/your_connect_id.json

ingress:
  - hostname: hestia.mydomain.com
    service: http://localhost:2083
# Cloudflare 官方支援的 Port 443, 2053, 2083, 2087, 2096, 8443
    originRequest:
      httpHostHeader: hestia.mydomain.com:2083
  - service: http_status:404
tunnel: your_connect_id
credentials-file: /home/user/.cloudflared/your_connect_id.json

ingress:
  # phpMyAdmin 走 Web Server (your-ip) 此設定區域必須在 hestiacp 之前
  - hostname: hestia.mydomain.com
    path: /phpmyadmin*
    service: http://your-ip:80
    originRequest:
      httpHostHeader: hestia.mydomain.com
.htaccess 補上正確 WordPress rewrite 規則內頁瀏覽才能正確
touch .htaccess
chmod 644 .htaccess
# BEGIN WordPress

RewriteEngine On
RewriteBase /
RewriteRule ^index\.php$ - [L]
RewriteCond %{REQUEST_FILENAME} !-f
RewriteCond %{REQUEST_FILENAME} !-d
RewriteRule . /index.php [L]

# END WordPress
nginx.conf 以支援 SSL 與 Cloudflare Tunnel:sudo vim /home/user/conf/web/mytunnel.mydomain.com/nginx.conf
server {
        listen      192.168.0.19:80;
        server_name mytunnel.mydomain.com ;
        error_log   /var/log/apache2/domains/mytunnel.mydomain.com.error.log error;
# 將下列註解
#       include /home/user/conf/web/mytunnel.mydomain.com/nginx.forcessl.conf*;

#       location ~ /\.(?!well-known\/|file) {
#               deny all;
#               return 404;
#       }
        location / {
                proxy_pass http://192.168.0.19:8080;

# 加入以下4項 proxy_set_header 設定將訪客的ip正確轉發
                proxy_set_header Host $host;
                proxy_set_header X-Real-IP $remote_addr;
                proxy_set_header X-Forwarded-For $proxy_add_x_forwarded_for;
                proxy_set_header CF-Connecting-IP $http_cf_connecting_ip;
                .
                .
                .
                .
sudo nginx -t
sudo service nginx reloadapache2.conf 以支援 SSL 與 Cloudflare Tunnel:這樣是為了讓 apache 正確的接收來自 nginx 正確 IP
sudo vim /home/user/conf/web/mytunnel.mydomain.com/apache2.conf
新增 RemoteIP 放在 VirtualHost 區塊內即可,例如:
<VirtualHost 192.168.0.19:8080>
    ServerName mytunnel.mydomain.com

    RemoteIPHeader CF-Connecting-IP
    RemoteIPInternalProxy 127.0.0.1
    RemoteIPInternalProxy 192.168.0.19

    ...
</VirtualHost>
sudo service apache2 restart
wp-admin 才能正常不會落入多重轉址導致不正常
wp-config.php 最前端加上:
//加上這段 wp-admin 才能正常轉址
// 若後端位於內網並由 reverse proxy (cloudflared) 轉送,強制 WordPress 認為是 HTTPS
// 最佳化後的 HTTPS 判斷
if (
    // 檢查 Cloudflare Tunnel/CDN 傳遞的標準 header
    (isset($_SERVER['HTTP_X_FORWARDED_PROTO']) && $_SERVER['HTTP_X_FORWARDED_PROTO'] === 'https') ||

    // 檢查 Cloudflare 傳遞的 CF-Visitor JSON header
    (isset($_SERVER['HTTP_CF_VISITOR']) && strpos($_SERVER['HTTP_CF_VISITOR'], '"scheme":"https"') !== false) ||

    // 檢查 Cloudflare 傳遞的真實 IP header,確保某些外掛正確運作
    isset($_SERVER['HTTP_CF_CONNECTING_IP'])
) {
    $_SERVER['HTTPS'] = 'on';

    // 為了讓 WordPress 記錄正確的訪客 IP,而非 Incus/Cloudflared 的內網 IP
    if (isset($_SERVER['HTTP_CF_CONNECTING_IP'])) {
        $_SERVER['REMOTE_ADDR'] = $_SERVER['HTTP_CF_CONNECTING_IP'];
    }
}
檢查 HTTP 狀態碼是否為 200 OK
SSL 憑證是否正確由 Cloudflare 提供
curl -I -v -H "Host: mytunnel.mydomain.com" http://192.168.0.19:8080/wp-admin/
如果要讓 tunnel 長期跑,最好建一個 systemd service:
sudo vim /etc/systemd/system/cloudflared.service[Unit]
Description=cloudflared tunnel
After=network-online.target
Wants=network-online.target
[Service]
ExecStart=/usr/local/bin/cloudflared tunnel run myTunnel
Restart=always
User=cloudflared_user
Environment=HOME=/home/user
[Install]
WantedBy=multi-user.target
sudo systemctl daemon-reload
sudo systemctl enable --now cloudflared
sudo systemctl start cloudflared